[Spring] 1. 프로젝트 환경설정
업데이트:
프로젝트 생성
준비
강의 상에서는 Java 11을 권장했지만, Spring boot 3.0 이상에서는 17버전이 요구되기에 17버전을 사용했다.
IDE로는 IntelliJ를 사용하기로 했다.
스프링 부트 스타터
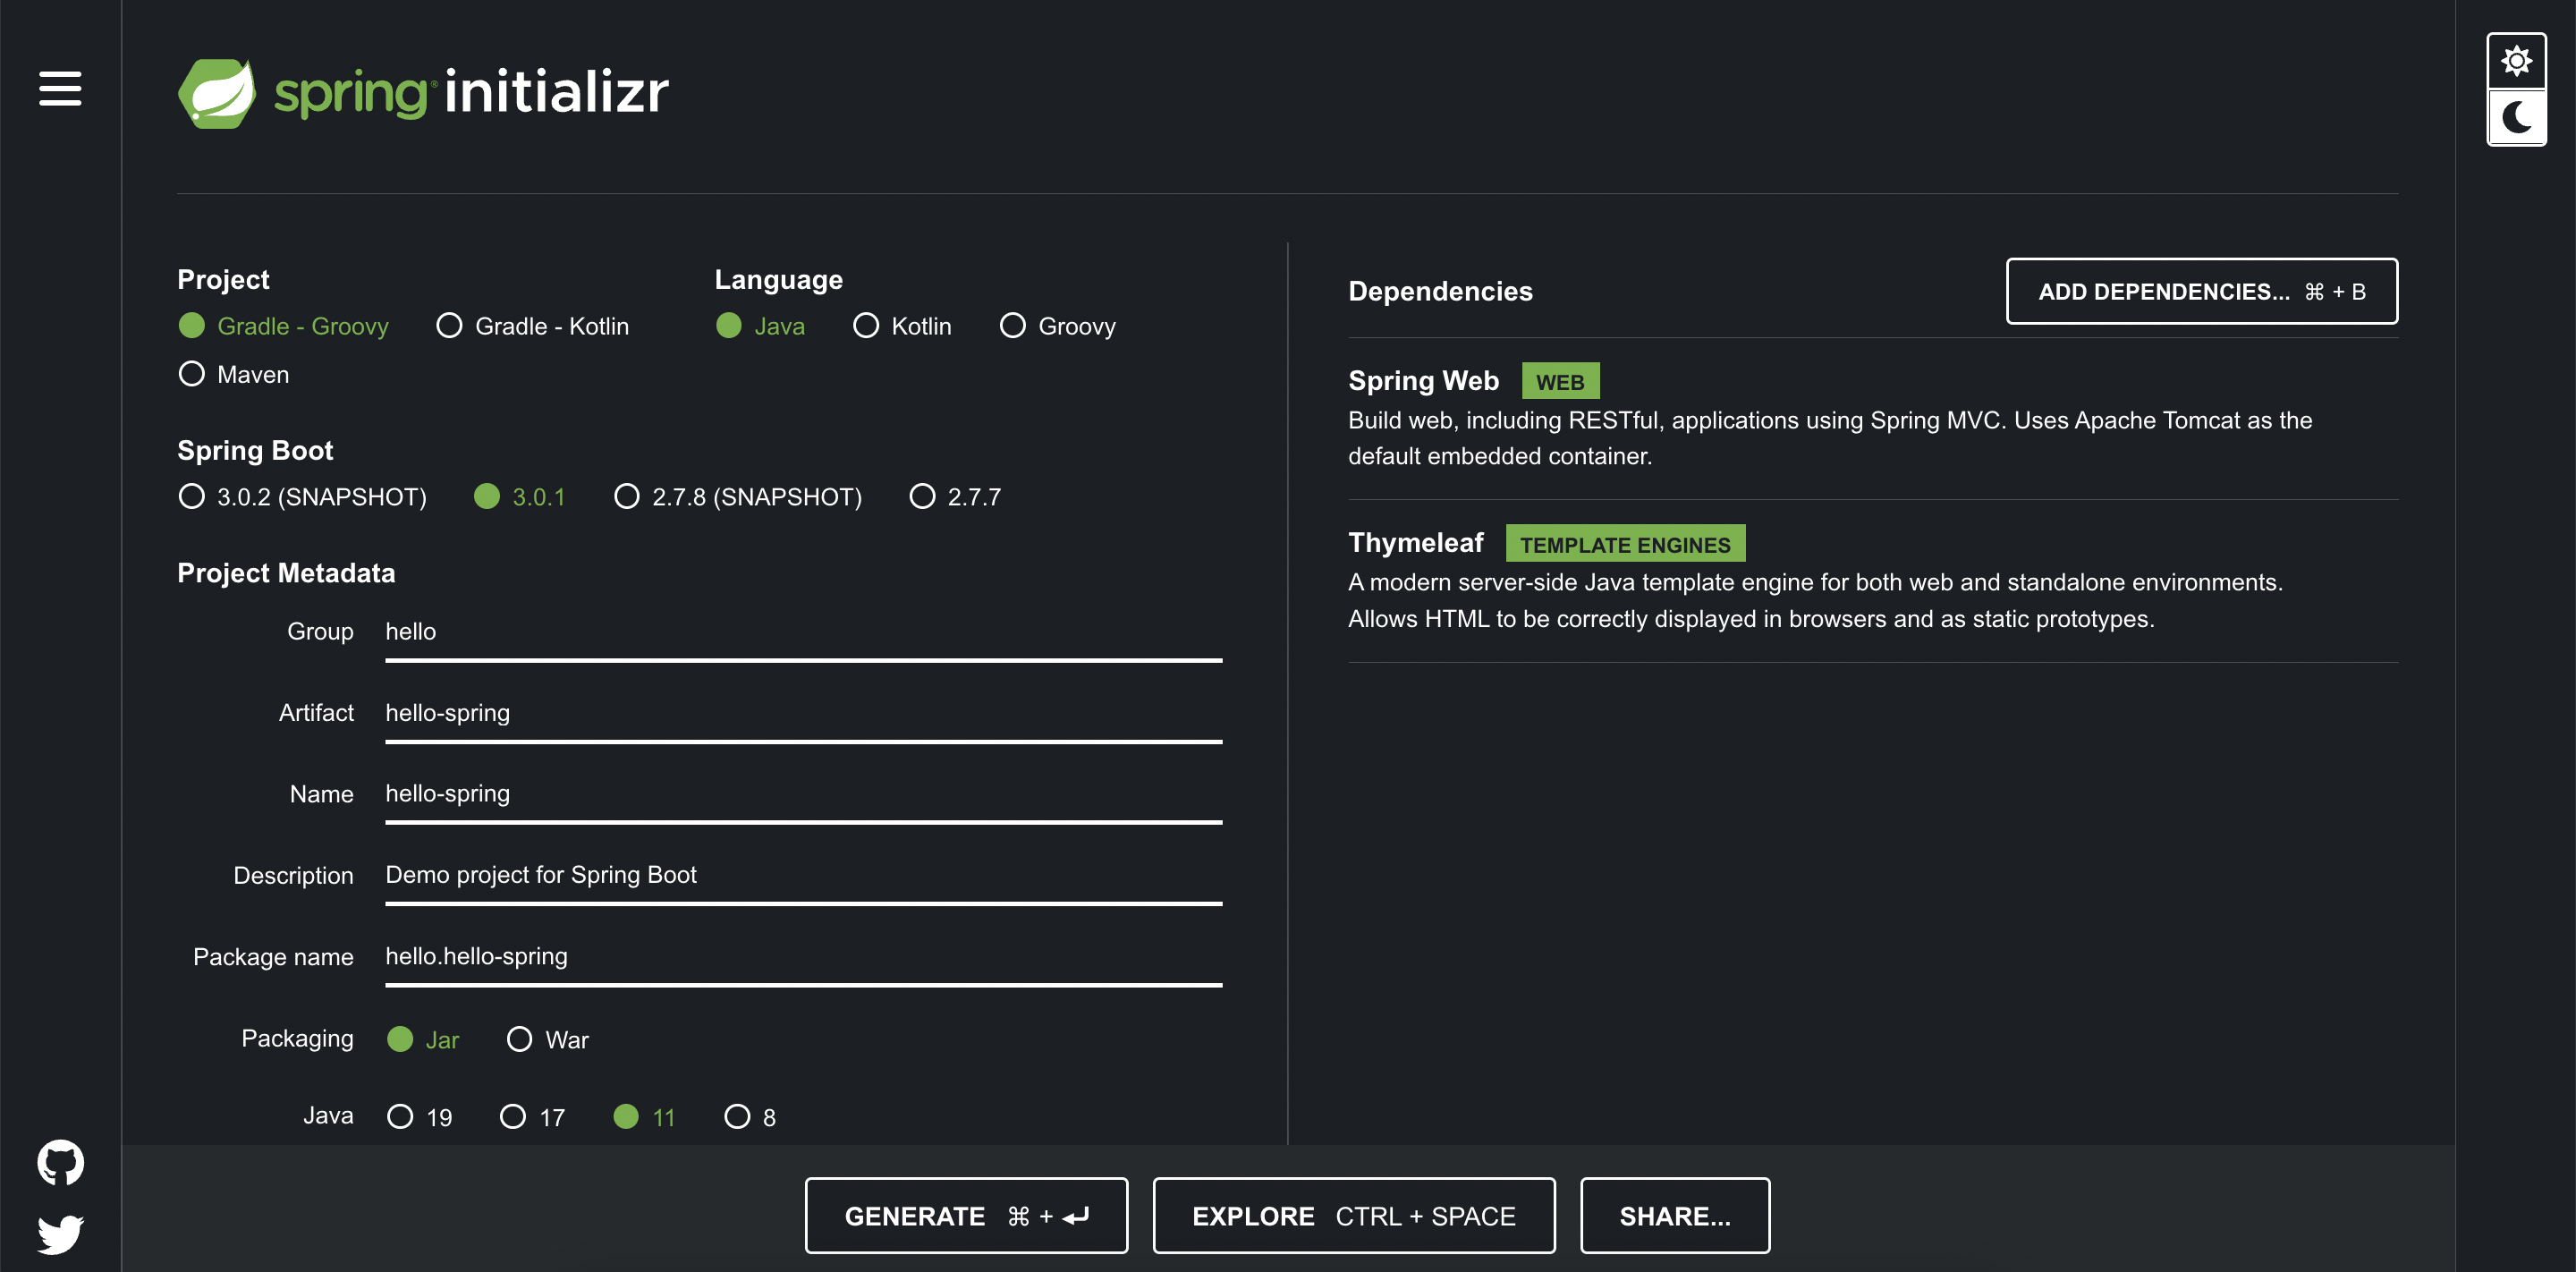
start.spring.io 를 이용해 프로젝트 초기 생성을 진행한다.
Gradel - Groovy, Spring Boot 3.0.1로 진행했고,
Dependencies(의존성)의 경우 강의에 따라 Spring Web, Thymeleaf를 추가했다.
라이브러리 살펴보기
build.gradle 을 살펴보면, 다음과 같이 위에서 추가해 주었던 라이브러리들을 확인 할 수 있다. 해당 라이브러리에서 필요한 의존성들의 경우 자동으로 추가되게 되어 외부에서 확인해 볼 수 있다.
1
2
3
4
5
dependencies {
	implementation 'org.springframework.boot:spring-boot-starter-thymeleaf'
	implementation 'org.springframework.boot:spring-boot-starter-web'
	testImplementation 'org.springframework.boot:spring-boot-starter-test'
}
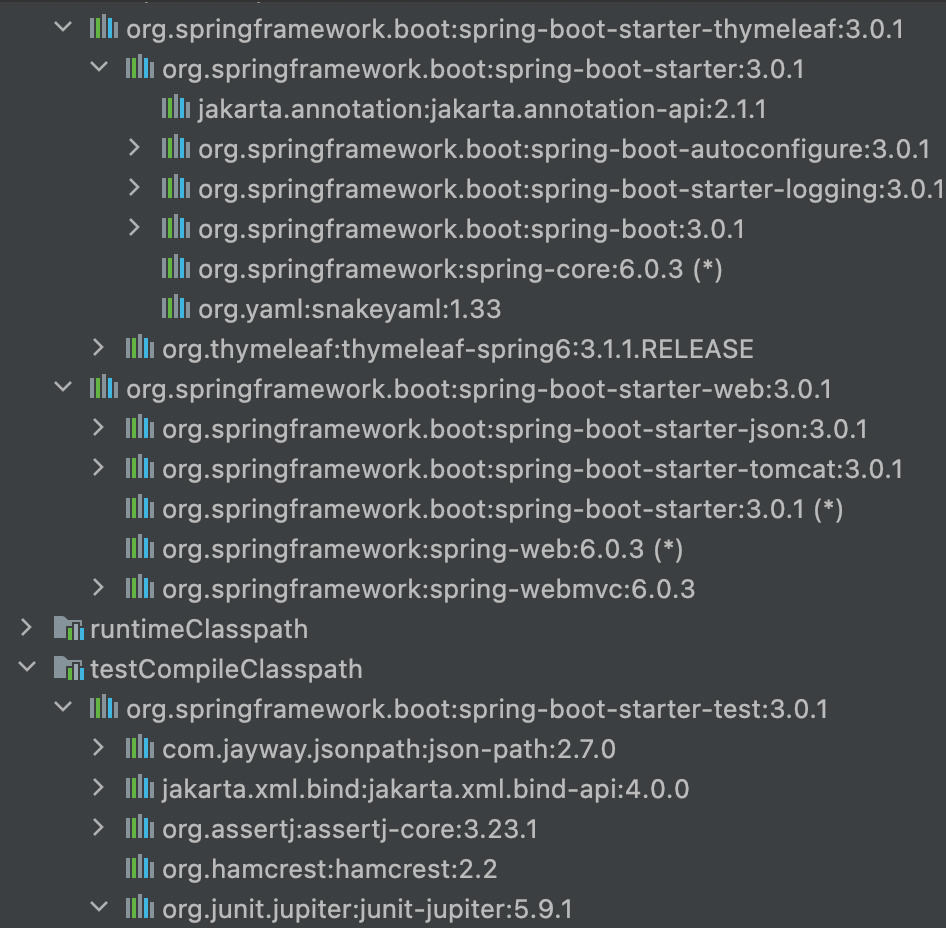
다음과 같이 Gradle로 다운로드 된 라이브러리들을 IntelliJ에서 확인 해 보면,
logging, tomcat, junit 등 로깅, 서버, 테스트 등에 필요한 다양한 필수적인 의존성들이 추가되어 있음으로 확인할 수 있다.
View 환경설정
Welcome page
앞서 생성한 프로젝트를 실행시킨 후 localhost:8080 에 접속해 보면 다음과 같은 에러 페이지를 마주하게 된다.
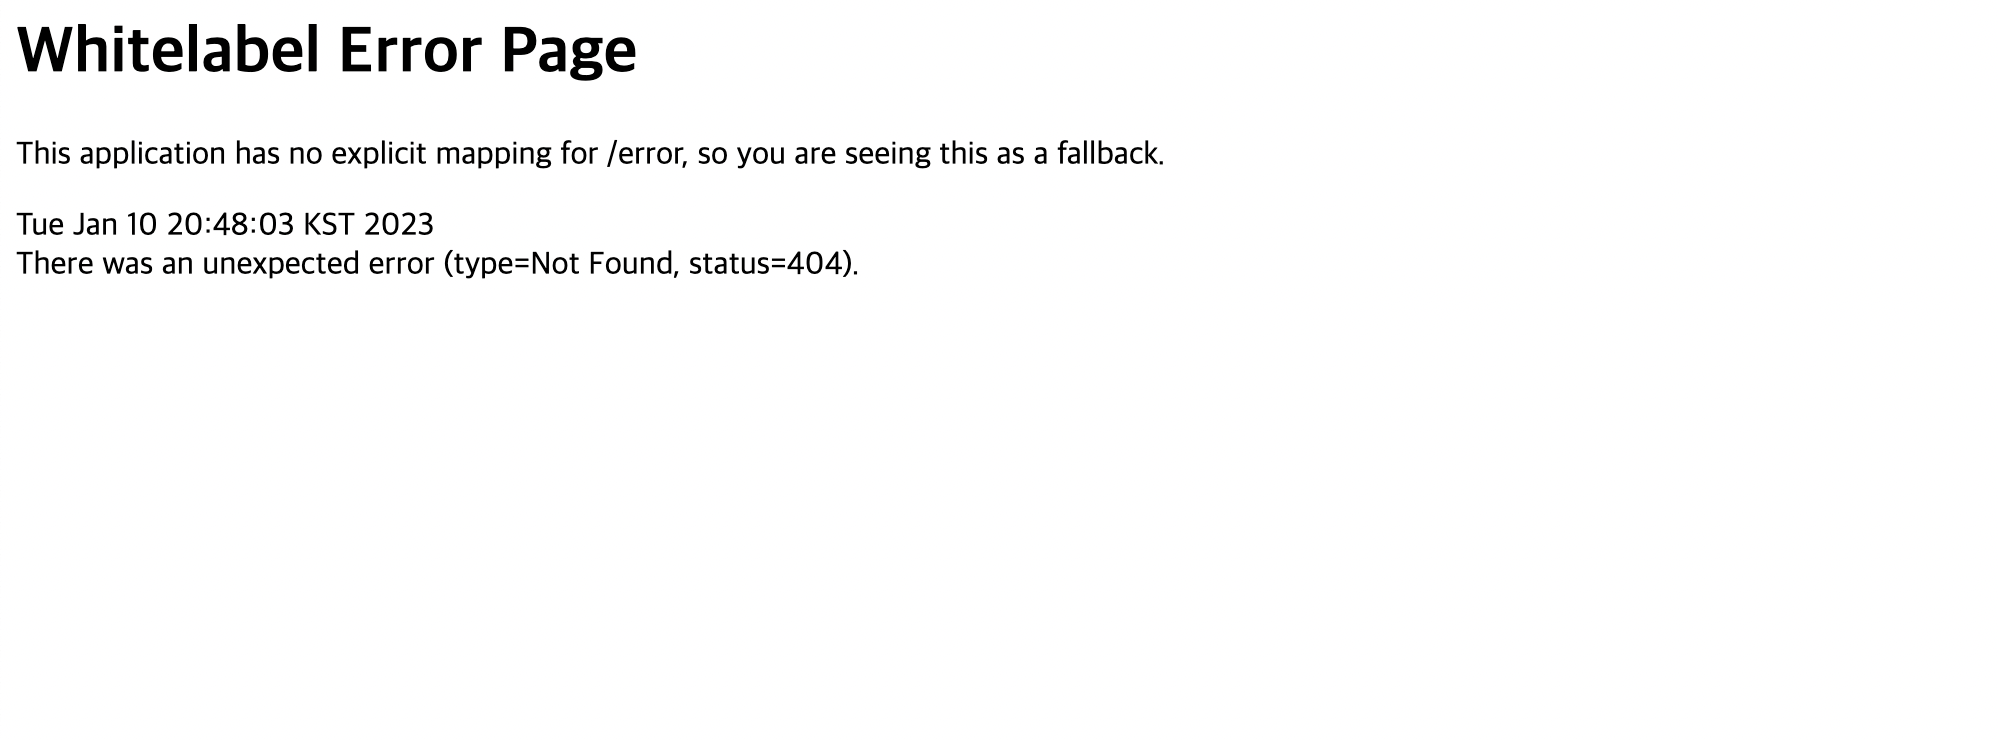
그 이유는 url에 해당하는(매핑된) 페이지가 없기 때문인데, static/index.html 을 통해 Welcome page 를 만들어 줄 수 있다.
Spring boot가 제공하는 기능이다. 참고
index.html을 다음과 같이 생성해 주면 시작페이지가 생성된다.
resources/static/index.html

Thymeleaf
Thymeleaf는 Spring Boot에서 권장하는 템플릿 엔진의 일종이다.
템플릿 엔진은 동적인 html 컨텐츠를 제공할 수 있게 해주는 역할을 한다.
위의 welcome page의 경우 데이터와 무관하게 이미 적재된 html 문서가 그대로 로드되는 정적 페이지이고, Thymeleaf를 이용해 템플릿으로 생성한 페이지의 경우 데이터를 불러와 문서를 가공한 후 보여주게 되는 동적 페이지가 된다.
hello 페이지의 템플릿을 먼저 만들자.
resources/templates/hello.html
xmlns:th="http://www.thymeleaf.org" 를 통해 Thymeleaf 를 불러오고 있음을 확인 할 수 있다.
8번 줄에서 th:text 타임리프 문법이 사용되었음을 확인 할 수 있다.
Thymeleaf와 관련된 더 자세한 사항은
Thymeleaf 공식 사이트, 스프링 공식 매뉴얼, 스프링부트 매뉴얼에서 찾아볼 수 있다.
그리고, 위의 페이지에 접근하기 위해 controller를 만들어주어야 한다.
main 함수가 존재하는 HelloSpringApplication.java 와 같은 디렉터리에 새로운 controller 패키지를 생성한 뒤, helloController.java를 만들어 주자.
controller/helloController.java
웹 브라우저에서 localhost:8080/hello로 접근 요청을 하면, 스프링부트의 내장 톰캣 서버에서 이를 확인해 helloController를 호출하고, 여기서 return된 hello를 viewResolver가 찾아 templates/hello.html을 Thymeleaf로 처리한 뒤 보여주게 된다.
서버를 다시 실행한 뒤 welcome page에서 hello 를 눌러 localhost:8080/hello 로 이동하게 되면 다음과 같이 정상 작동함을 확인할 수 있다.

빌드
gradlew 를 통해 빌드가 가능하다.
1
./gradlew build
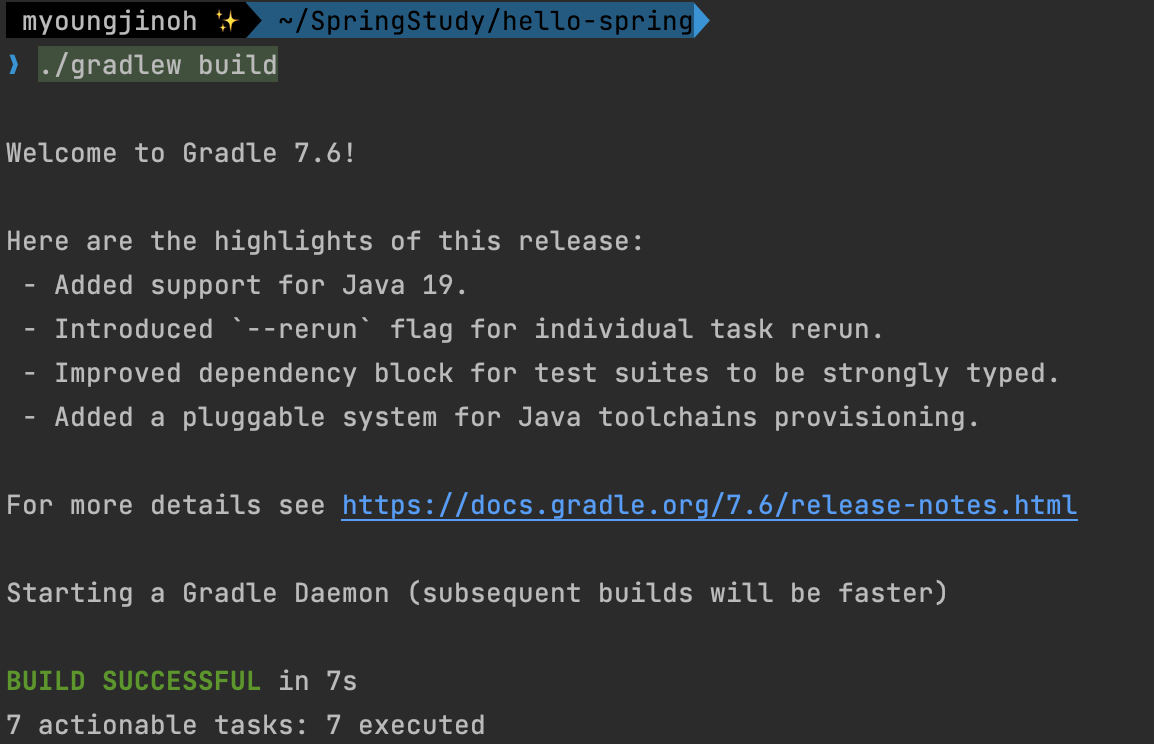
위와 같이 빌드가 완료되면, libs 안에 .jar 로 빌드된 파일이 생성된다.
여타 자바 프로그램들과 동일하게 java -jar *.jar 로 실행할 수 있다.
빌드에 실패한다면, ./gradlew clean build 를 통해 기존의 빌드를 지우고 다시 시도해 보자.
댓글남기기